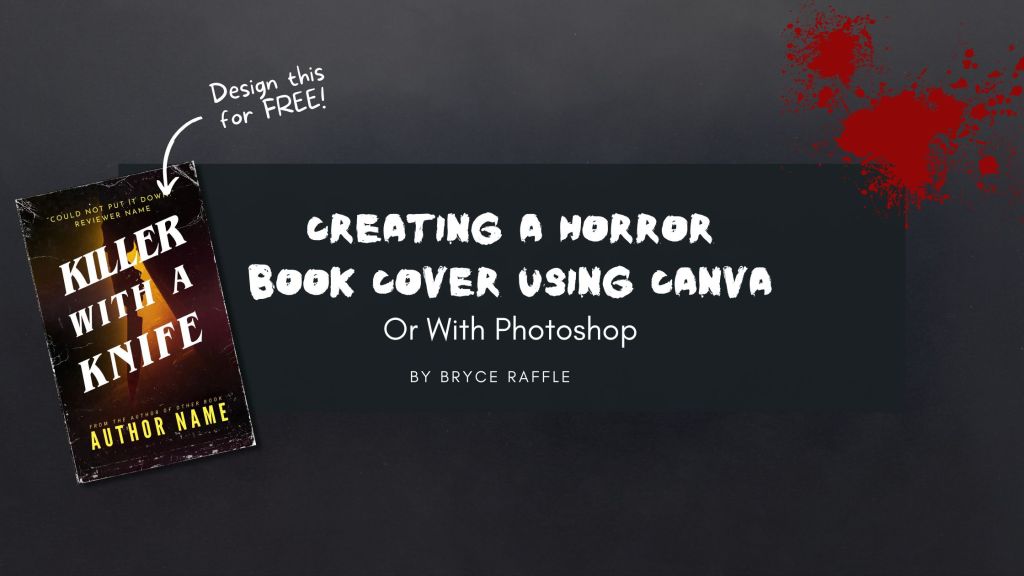
In an earlier post, I demonstrated designing a book cover using Canva. I do most of my cover design work in Photoshop, but Canva is a great tool that I use regularly to design as well, so this time, I thought it would be fun to try designing the same cover in both Photoshop and Canva.
Remember, if you don’t wish to design your own cover, you can always purchase a premade cover, like the ones I sell over at: thebookcoverdesigner.com/designers/bryce-raffle-designs
But if you’re feeling brave – and if you’re a horror author – why not try designing your own horror book cover using Canva. Or if you’ve got a copy of Photoshop loaded on your computer, give it a go!
Steps to Create a Horror Book Cover in Canva
Step 1: Create a New Project
- First, you’ll need to create an account. Either download the Canva desktop application or use the browser version at www.canva.com/
- Next, open Canva and start a new project (Click “Create A New Project” and select the Book Cover template. Canva provides a preset size for book covers, ensuring it fits standard eBook and print formats.

Step 2: Add Text
- Choose a horror-appropriate font. I’ve selected ITC Benguiat for the title, Josefin Sans (in all caps) for the tagline, and League Gothic for the author’s name. It’s generally best to use no more than three fonts.

- Change the background to black and set the title to white for a stark, eerie contrast. Use yellow for the author name and tagline. Yellow is often used in horror and thriller novels and is a bold choice that will look great with the image I’ve chosen for this cover.


Step 3: Choose a Background Image
- Canva has a lot of royalty free photos you can use, but I often find better photos on Unsplash. This time, I found a great horror photo by searching “Slasher” on Unsplash. I found this one:

Upload your image to Canva, add it to your project.
- Drag the image layer below the text using Canva’s layer adjustment tool.

I also rotated the image and resized it for an interesting off-angle look. I think it’s already looking pretty decent.

Step 4: Add Texture
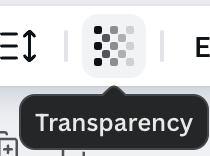
- I used “Paper 256” from Texture Labs, uploaded it to Canva, rotated it 90 degrees, resized it to fit and set the transparency to 61. Just click on Transparency to adjust
- I then used “Colorful Horizontal Smoke” by sparklestroke on Canva and adjusted the transparency to 31.
- Finally, I used “Background 1” by olhardealice on Canva and adjusted the transparency to 2.
This is how it turned out:

Step 5: Adjust Colour/Brightness/Contrast
Now that we’ve added some texture, it’s starting to look a bit too dark. We want the image to pop, so select the main image layer (Click on Position>Layers>Select the image), then click the edit button.

Click adjust.

Then adjust your settings until the image looks more vibrant. These are the settings I used.

And this is the result.

Step 6: Add Additional Horror Elements
- Search “grunge” in Elements and choose some grunge textures. I’ve chosen “Grunge Paint Splatter” by minettes2k. Then I clicked on the colour wheel and selected white, and I’ve positioned it in the top left corner. I adjusted the transparency to 70.
- I also added “Illustration of Splatter” by OpenClipart-Vectors from pixabay. I adjusted transparency to 51 and placed it in the bottom left corner.
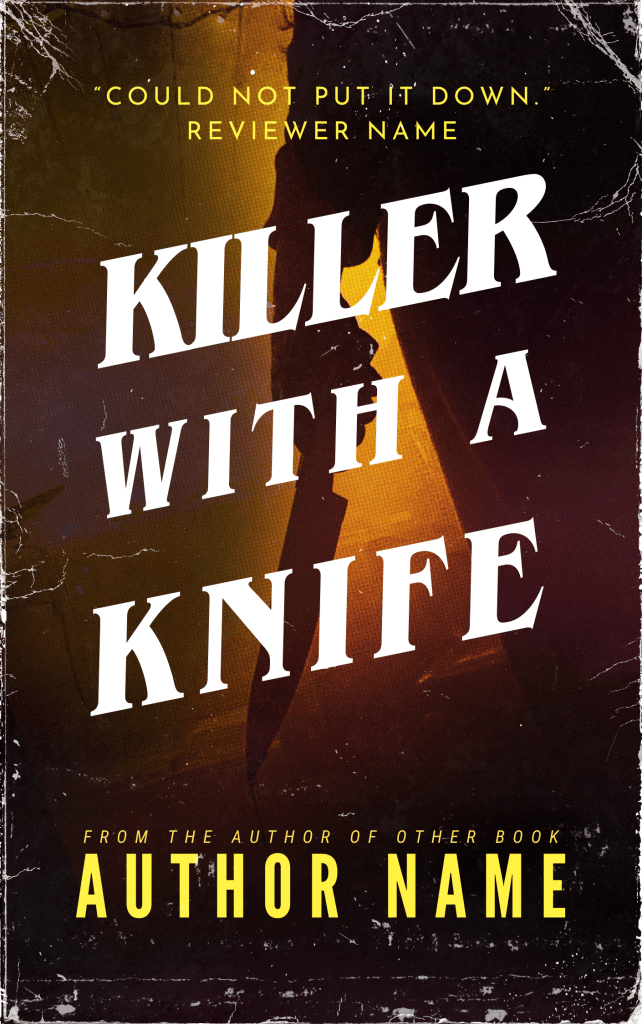
The final result:

Final Touches
- Review the design and make any final adjustments.
- Ensure text is legible and all elements create a cohesive horror aesthetic.
I’m pretty happy with how it turned out. If you’re just using Canva, here’s where you’d export your result. Download the final design as a high-resolution PNG or PDF for publication (do this by clicking Share>Download).
But I also wanted to see how it would look in Photoshop. So, I exported all the layers from Canva individually, as PNG files and selected “Transparent Background.” (I had to sign up for a free trial to use transparent background).
Photoshop Version
I opened up Photoshop and recreated the cover, redoing the text with Photoshop’s tools. Here, I had a few additional options. For instance, in Photoshop, I was able to distort the text to give it a sharp angle. I used pretty much the same fonts in Photoshop as I did in Canva (Benguiat Pro ITC for the title).

Next, I added additional textures, just as I did in Canva. But instead of adjusting the transparency as drastically as I did in Canva, I changed the layer blending mode to screen. I added a worn paperback texture, a gritty texture, and a half-tone texture to give it a retro vibe. I also adjusted the Brightness/Contrast with an adjustment layer.
Finally, I created some extra layers and on one layer, I brushed on some red overtop of the knife and changed the screen mode to “color” so the knife would look extra bloody. On another few layers, I brushed on some black and changed the blend mode to multiply, using it to blend the Christmassy-looking string lights hanging up in the photo, which I didn’t really think suited the look of the cover. I was very happy with the result.

And remember, if you’d rather not do it yourself, this cover (and many more like it) is available on my store. You’ll find it here:
https://thebookcoverdesigner.com/premade-book-covers/killer-with-a-knife/
What do you think of the recent trend of retro style book covers? I’ve noticed many popular authors like Stephen King and Grady Hendrix using these retro styles for their books. Let me know what you think in the comments!

2 responses to “Creating A Horror Book Cover Using Canva or With Photoshop”
Damn, Bryce, these step-by-step instructions are fantastic! I’ll tell you what else is fantastic: The set of covers Bryce gifted me for my Beyond the Rails trilogy. I just hope you don’t put yourself out of business with all this how-to instruction!
LikeLike
Thanks, Jack! I really enjoy doing book cover design and I’m happy to share my work and my knowledge with others! And I was very happy to gift you those Beyond The Rails covers as a fan of your series. To be honest, business has never been all that great in terms of book cover sales, so I don’t think it’s doing any harm by sharing my walk throughs. Maybe it will get me some extra eyes on my cover design work and actually help sales…? Who knows! Either way, it is a fun hobby for me that occasionally generates sales, which basically just helps me pay for my photoshop subscription…
LikeLike